TL;DR
ChatGPT Update adds features that let ChatGPT work with your computer, connected apps, and daily workflows. You can set up permissions, connect Google Drive, automate tasks, and improve results with better prompts.
ChatGPT now supports more than basic conversations. The guide explains how to enable computer features, use browser access, create automated schedules, and work with documents inside ChatGPT.
You'll also see how permission modes and local or cloud execution affect the way ChatGPT handles tasks. These settings help you choose the right workflow for different needs.
Key points
- ChatGPT Update introduces computer access, browser support, and workflow automation features.
- Google Drive integration helps you create and manage documents directly in ChatGPT.
- Prompt optimization and new interface settings improve task accuracy and control.
Table of Contents
Introduction
We know one thing for sure: ChatGPT doesn't want to stay behind in AI race.
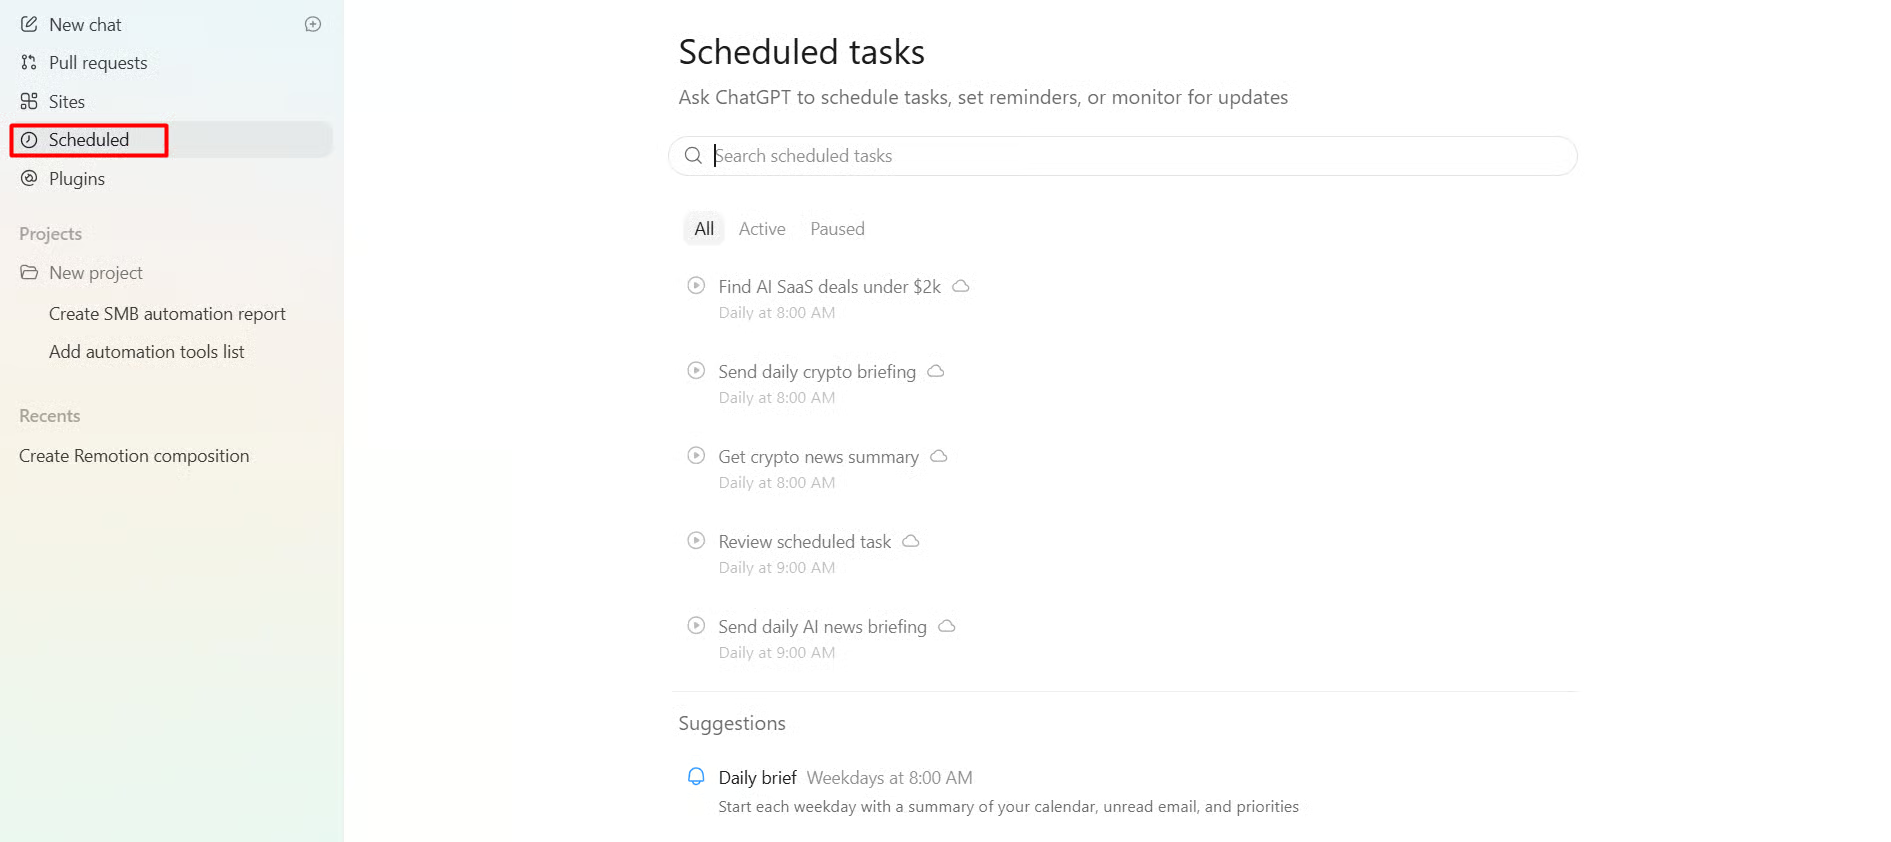
In August 2026 alone, OpenAI shipped Computer History, Google Drive editing, restaurant reservations, interactive quizzes, and a revamped Scheduled Tasks system.
This guide walks you through each one: what it does, how to turn it on, and the stuff nobody else is telling you about.
What's your biggest ChatGPT struggle? 🫥
🫨 Basic prompts only.
📁 Too many manual tasks
🔄 Repeating the same work
⚙️ Missing advanced features
AI-generated Podcast: Spotify | Apple Podcasts | YouTube.
First, not all of these features are available to everyone. Here's the actual breakdown before you go hunting for settings that don't exist on your account yet:
| Feature | Plans required | Platform |
|---|---|---|
| Computer History | Pro, Business, Enterprise | macOS desktop app only (US first; EEA/UK/Switzerland rolling out now) |
| Google Drive (editing) | Plus, Pro, Business, Enterprise | Web |
| Scheduled Tasks | Plus, Pro, Business, Enterprise (task limits vary by plan) | Web, mobile, desktop |
| Restaurant reservations | All plans | Web, mobile, desktop |
| Interactive quizzes | All plans | Web, mobile |
| Permission modes | Desktop app users | macOS and Windows |
Also, a quick note on naming: OpenAI renamed things again this year. What used to be called "Connectors," then "Apps," now lives inside Settings → Plugins. If a step below says "Apps" and you don't see it, look for "Plugins".
I. Set Up ChatGPT on Your Computer
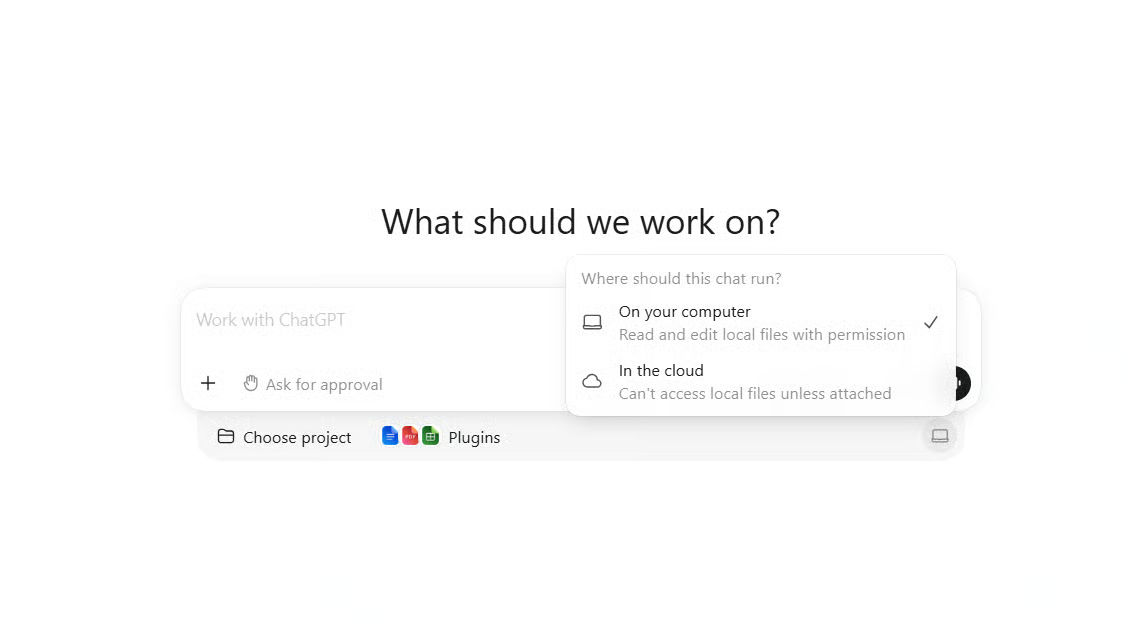
ChatGPT update brings major changes to how ChatGPT works on your computer. Before you use features like automation, file access, or workflow support, you need to set up a few basic permissions first.
Step 1: Choose Your Permission Mode
There are 3 modes, and they work very differently:
| Mode | What it actually does |
|---|---|
| Ask for approval (default) | ChatGPT can work within your current workspace and asks before doing anything beyond that boundary, like accessing the internet or other files |
| Approve for me (called "Auto-review" in settings) | ChatGPT decides which actions need your confirmation and only asks when it detects something potentially risky |
| Full access | ChatGPT can complete more actions without asking every step |
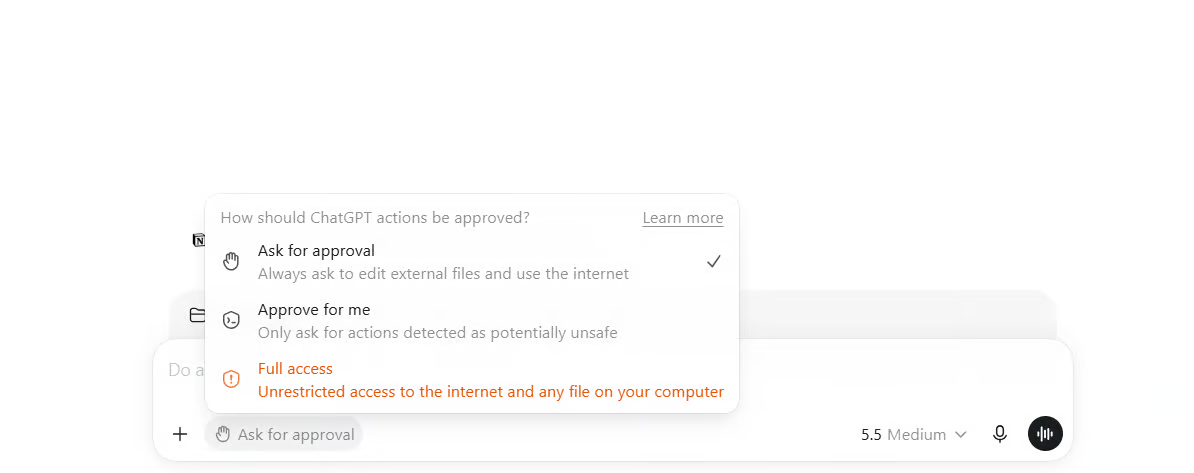
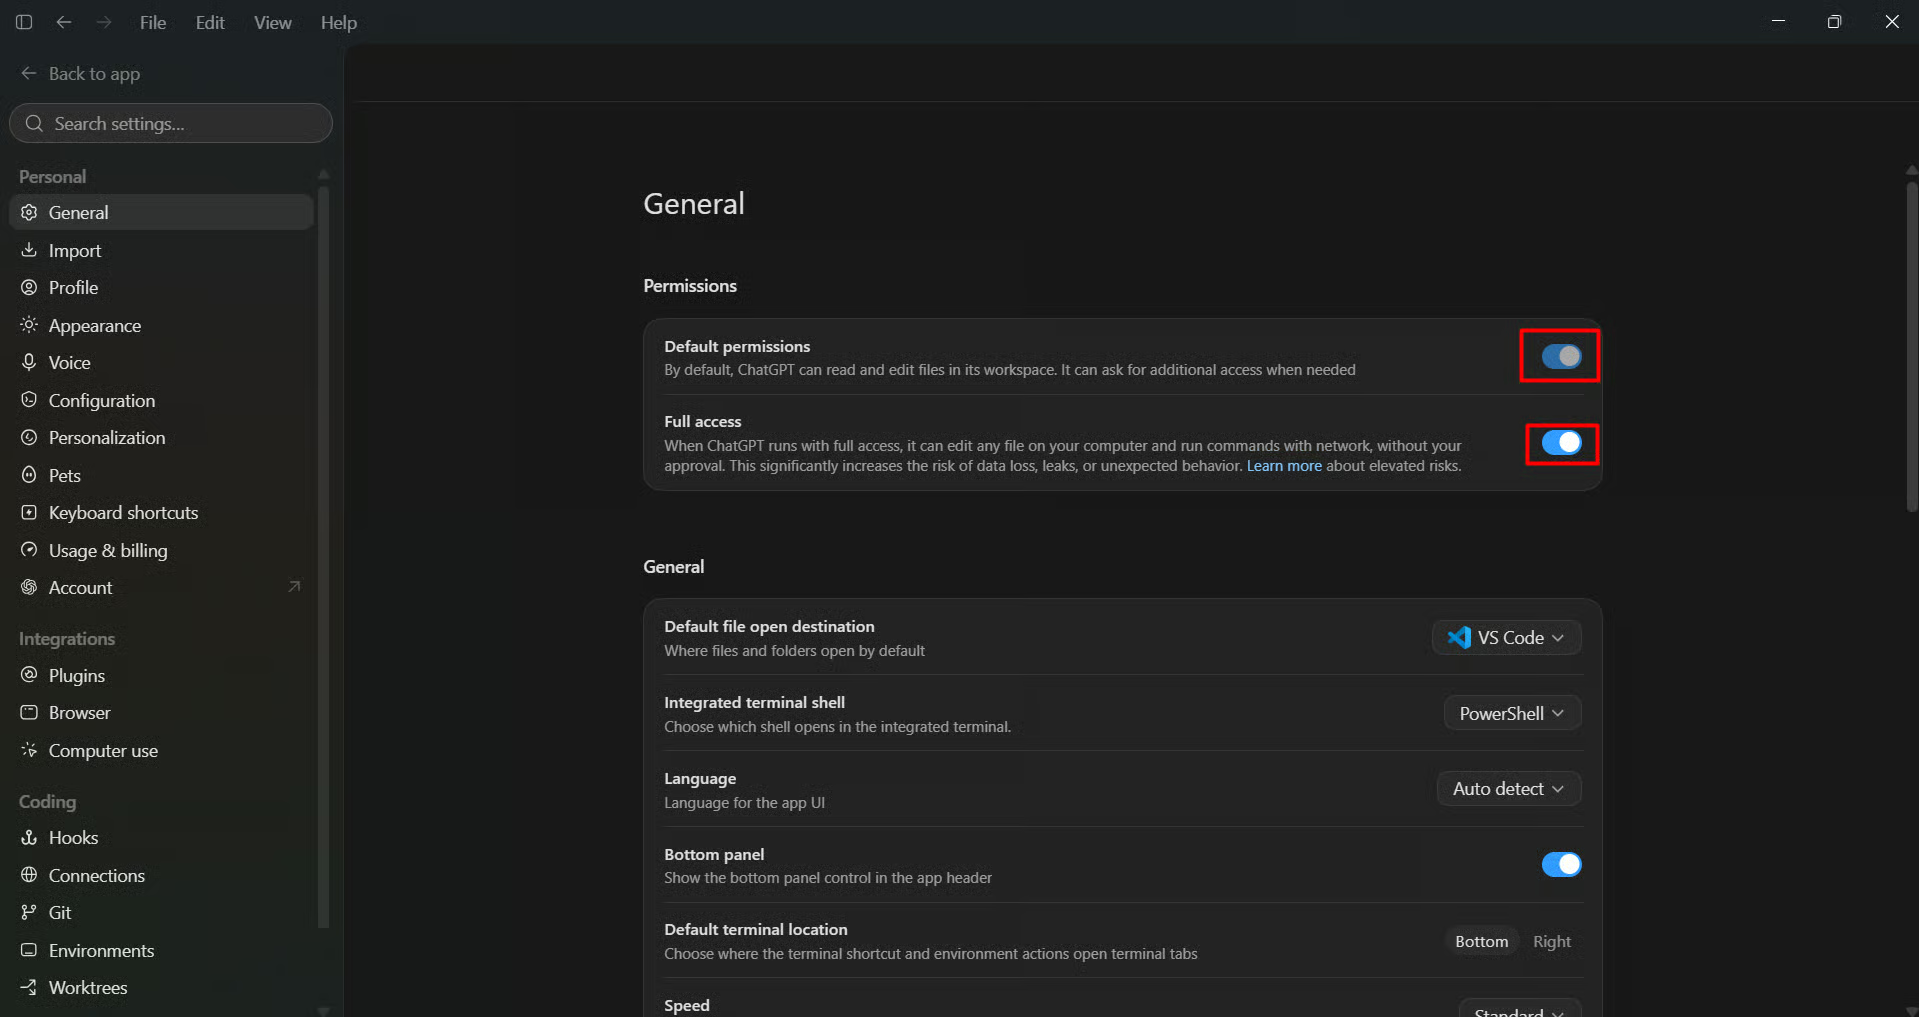
⚠️ Important: Ask for approval is always available by default. To unlock "Approve for me" or "Full access", you have to go to Settings → Generalin the desktop app first and manually enable them under Permissions. Just enabling the mode doesn't select it, you still have to choose it in the menu per session.
For me, just start with "Ask for approval." It's not as slow as it sounds, and it'll save you from surprises. Move up when you're comfortable.
Step 2: Turn On Computer History (macOS only)
Okay, I need to be upfront with you here, because this is the feature generating the most buzz and the most confusion right now.
What it actually does: Computer History observes what you actually do, which documents you opened, what you typed, which folders you moved files into, and which sites you visited, without recording your screen or audio. Think of it like a smart work journal that ChatGPT can reference later.
How to turn it on: Go to Settings → Integrations → enable Computer History.
But there's 4 things you need to know first:
- Computer History is off by default and currently available only to US ChatGPT Pro, Business, and Enterprise users on macOS. EEA, UK, and Switzerland access is now rolling out as of this week.
- You choose which apps and websites contribute, and you can pause collection and review or delete your history at any time. You decide what it sees.
- The memory files are stored locally as unencrypted plain text. That's a real privacy consideration worth knowing before you enable it.
- Raw interaction event files remain on the Mac for up to 48 hours while OpenAI processes them; the resulting memories persist locally as readable Markdown until deleted.
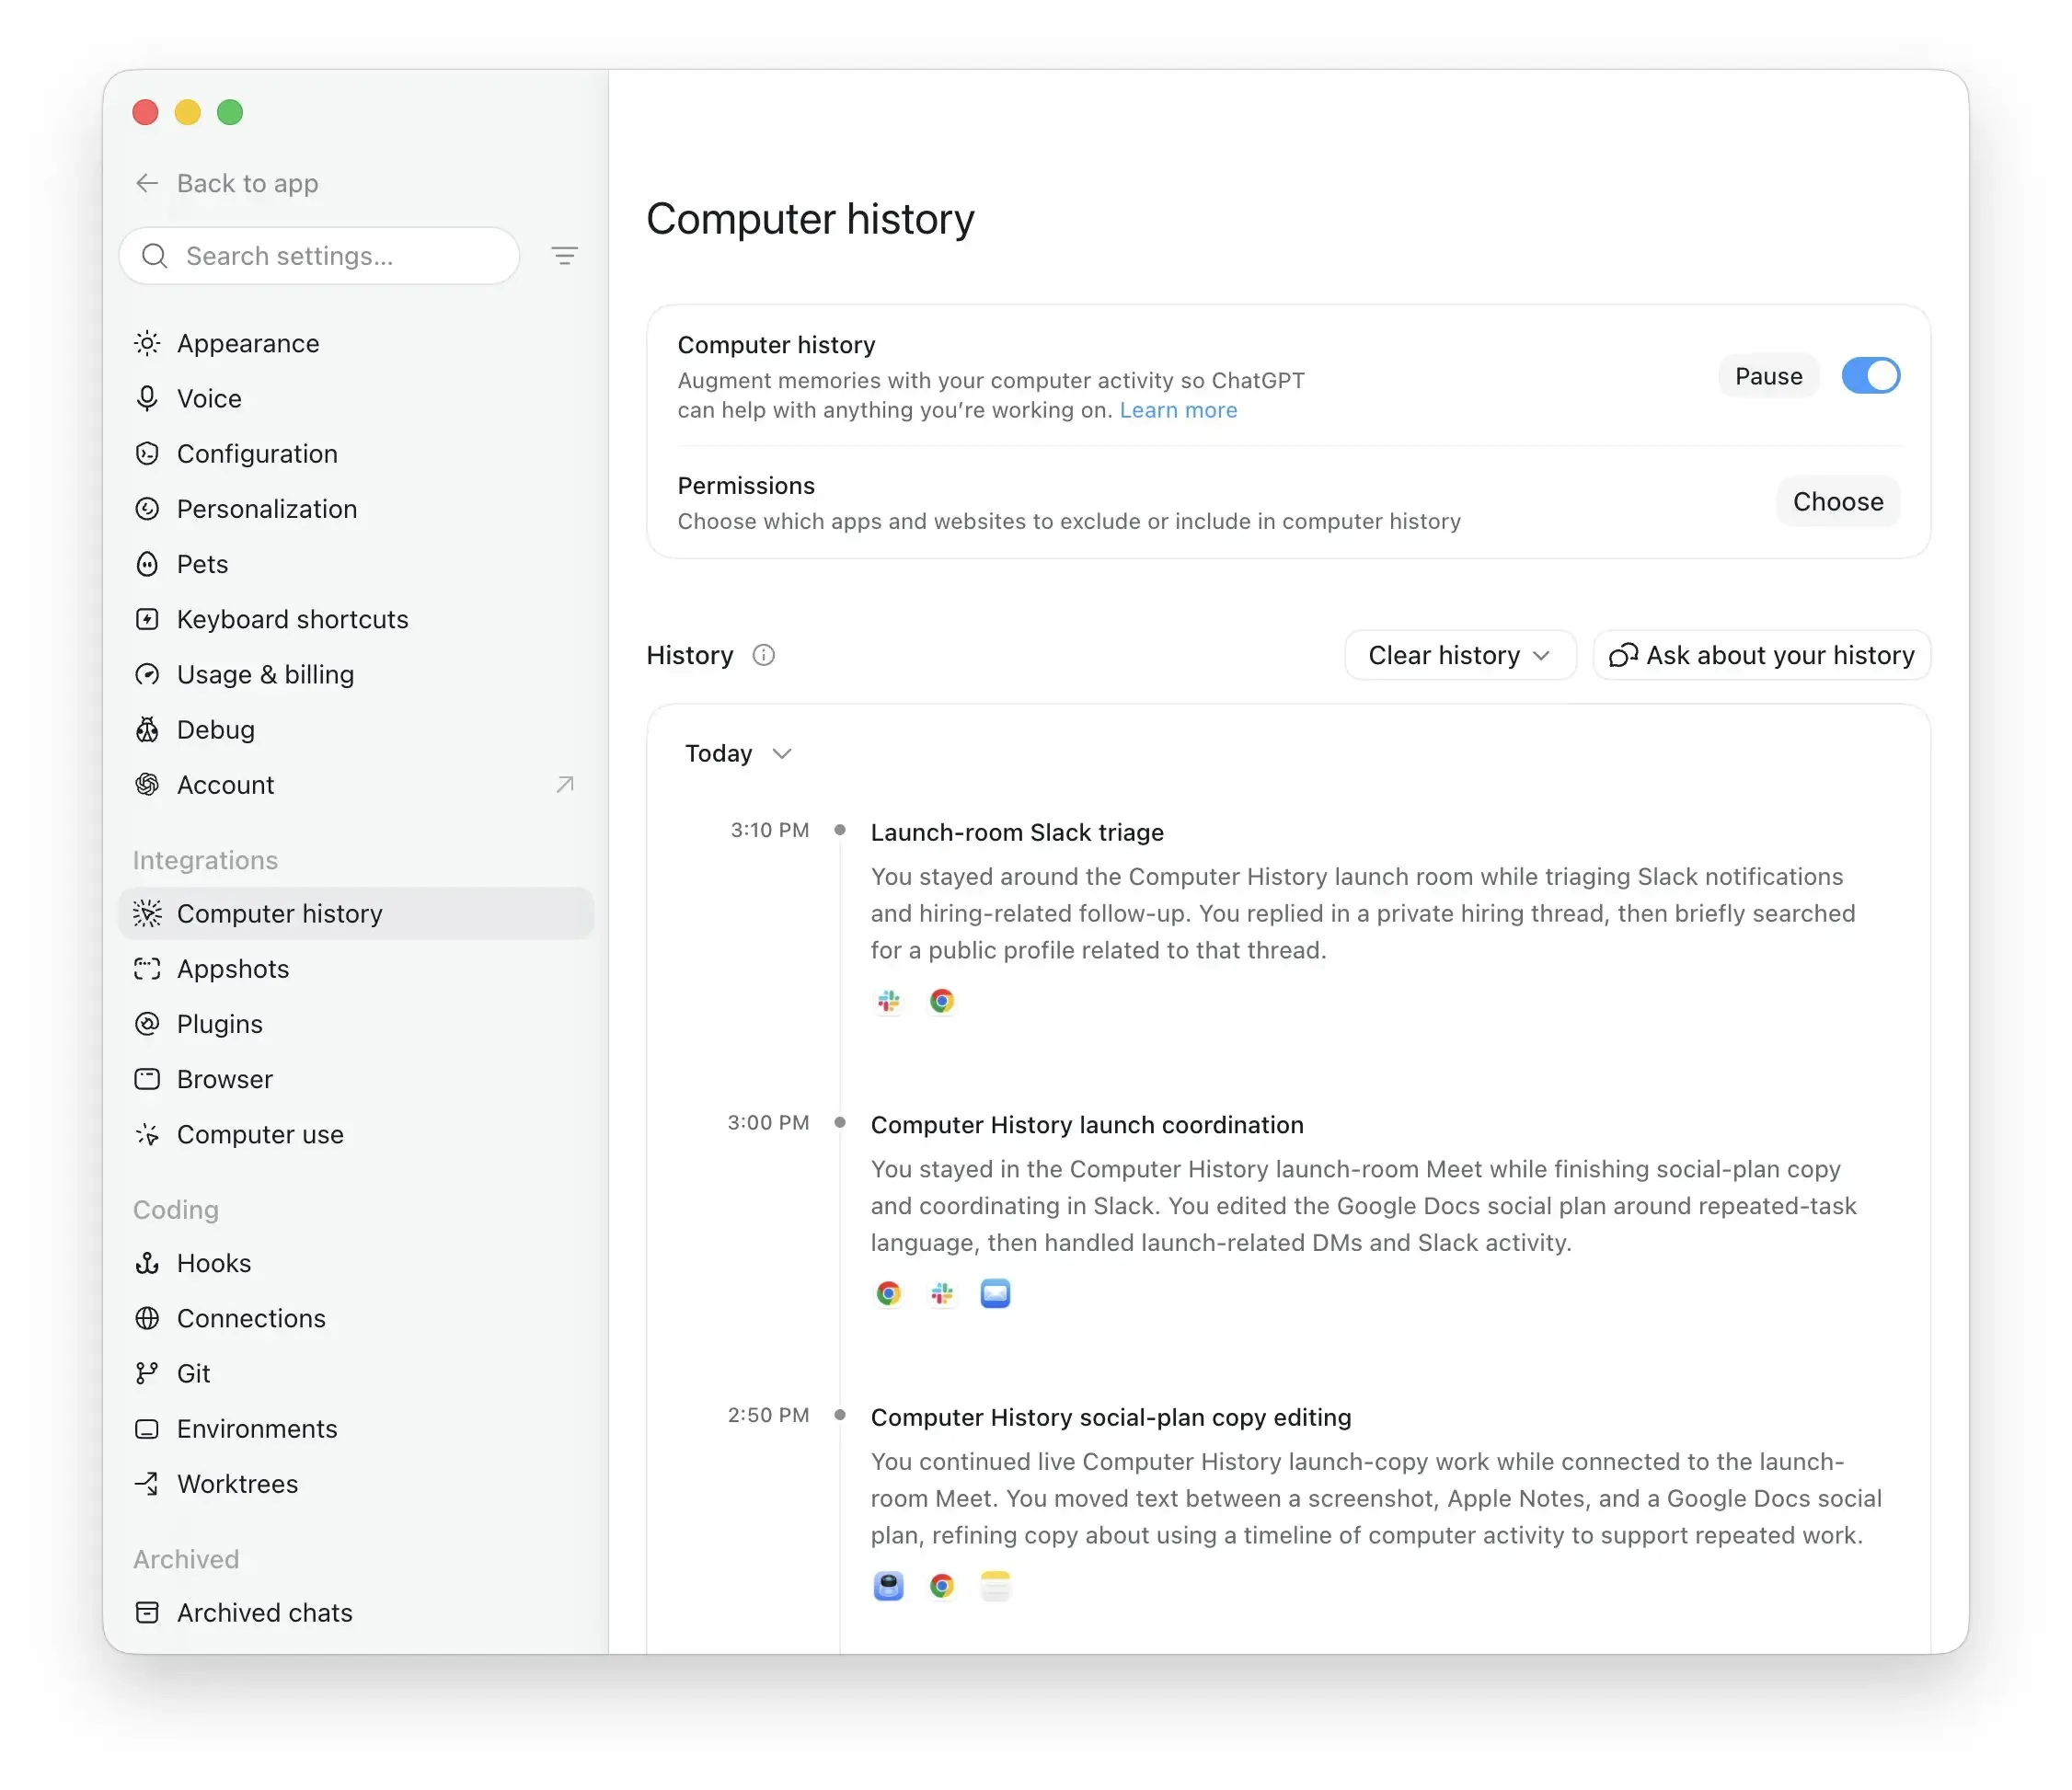
So should you enable it? It's genuinely useful for recovering context ("what was I working on before lunch?") and having ChatGPT suggest automations based on your real habits. But if you handle sensitive data, go slow, choose which apps contribute carefully.
This feature requires ChatGPT Memories to be enabled first. Check Settings → Personalization → Memory before trying to activate Computer History.
Learn How to Make AI Work For You!
Transform your AI skills with the AI Fire Academy Premium Plan - FREE for 14 days! Gain instant access to 700+ AI workflows, advanced tutorials, exclusive case studies and unbeatable discounts. No risks, cancel anytime.
Step 3: Set Up Browser Access
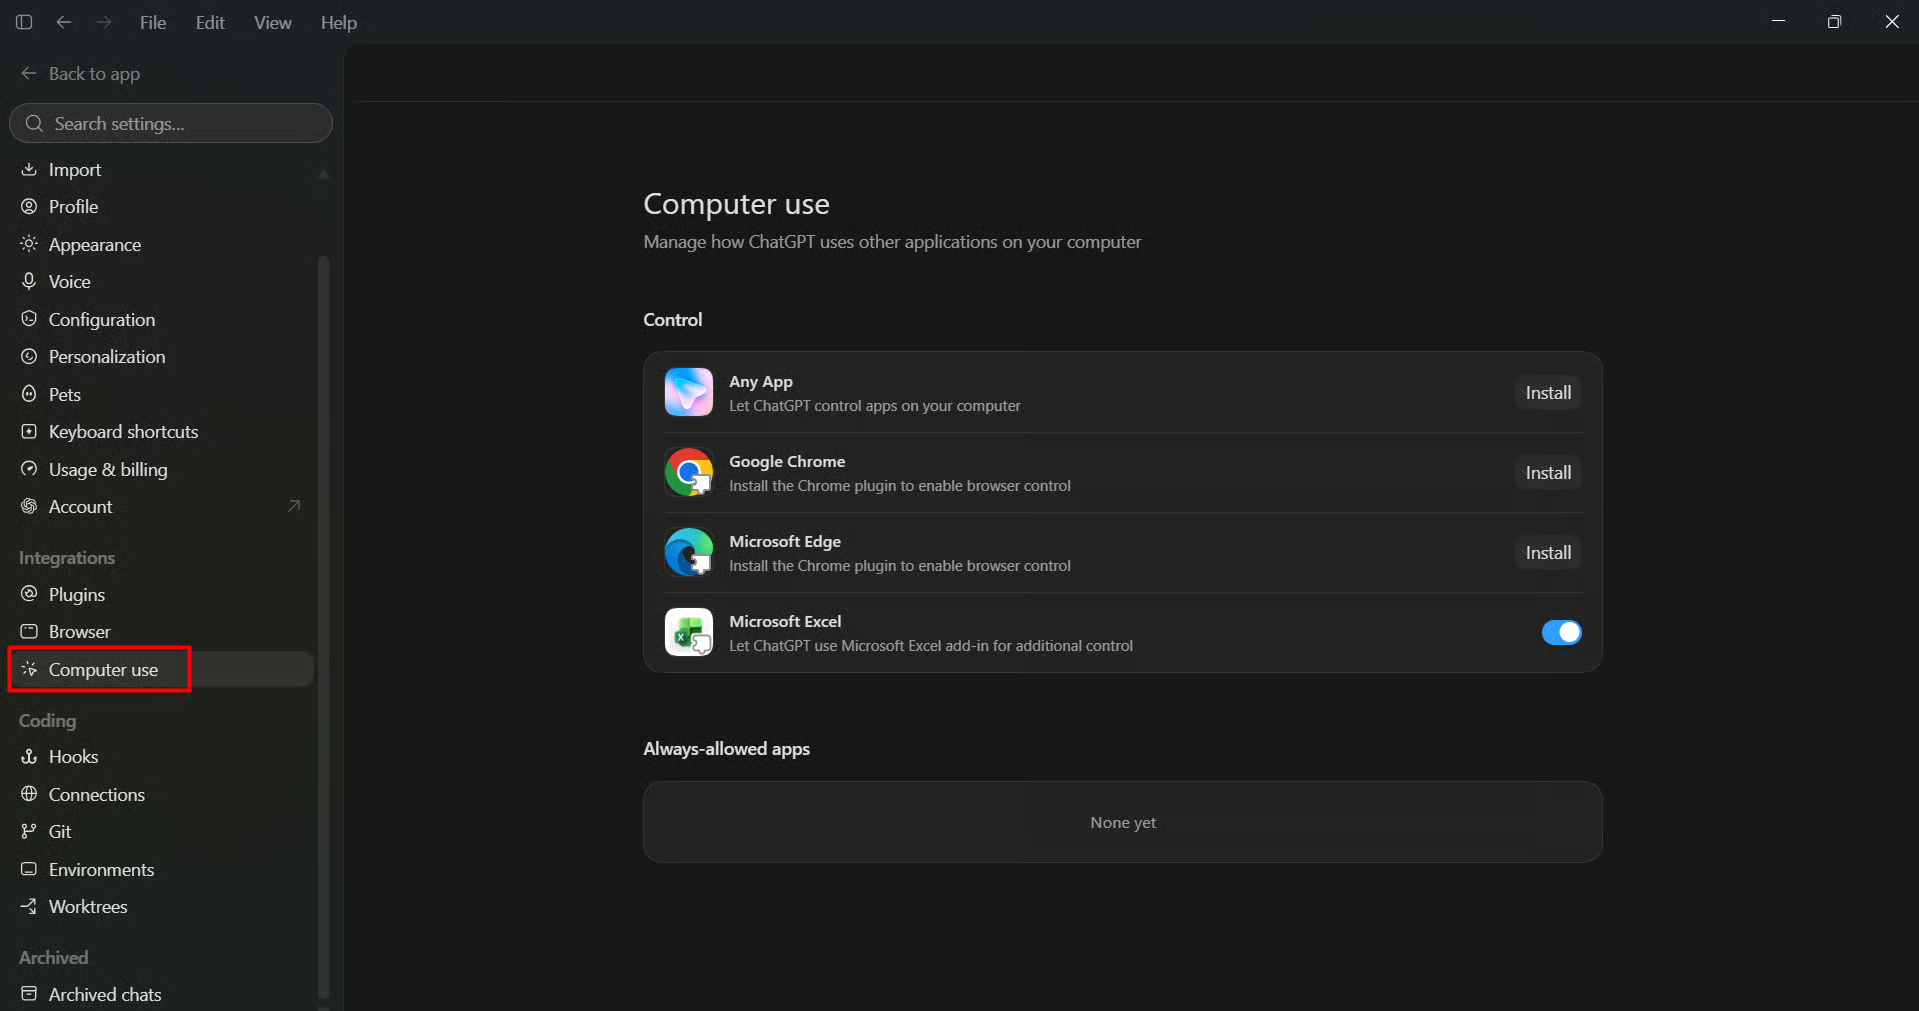
Recently, OpenAI deprecated its Atlas browser and is building a more capable browser experience into ChatGPT and Codex directly, including multiple tabs, downloads, improved navigation, and account login support.
In practice:browser-based tasks now work through ChatGPT's built-in web access (search + browsing). If you're on a paid plan and web search is enabled, you already have this.
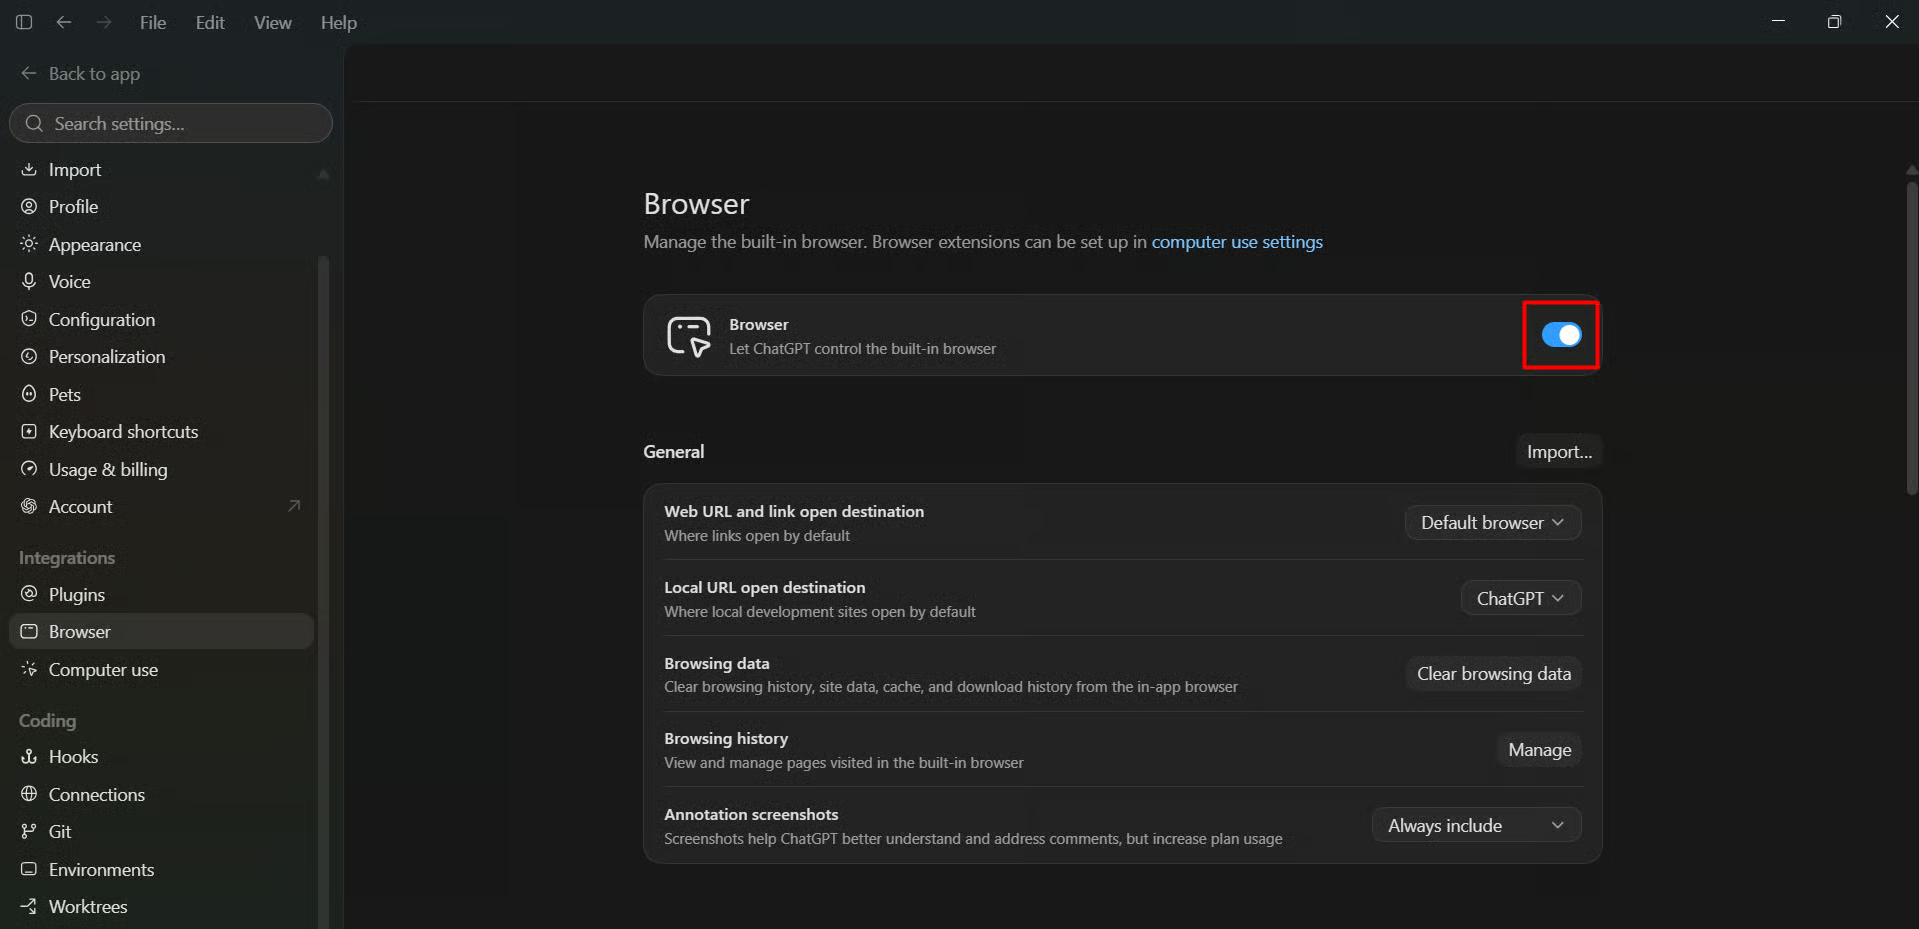
This feature works well when you need ChatGPT to gather information, check details online, or help you handle tasks that involve your browser.
For tasks that involve actually controlling your desktop, that's Computer Use, which requires installing the Computer Use plugin from the ChatGPT desktop app.
II. Connect ChatGPT to Your Work Tools
After you set up the main ChatGPT update features, you can start connecting ChatGPT with your daily tools and creating workflows that make your work easier.
These features help you handle repetitive tasks, work with your existing files, and organize your workflow directly inside ChatGPT.
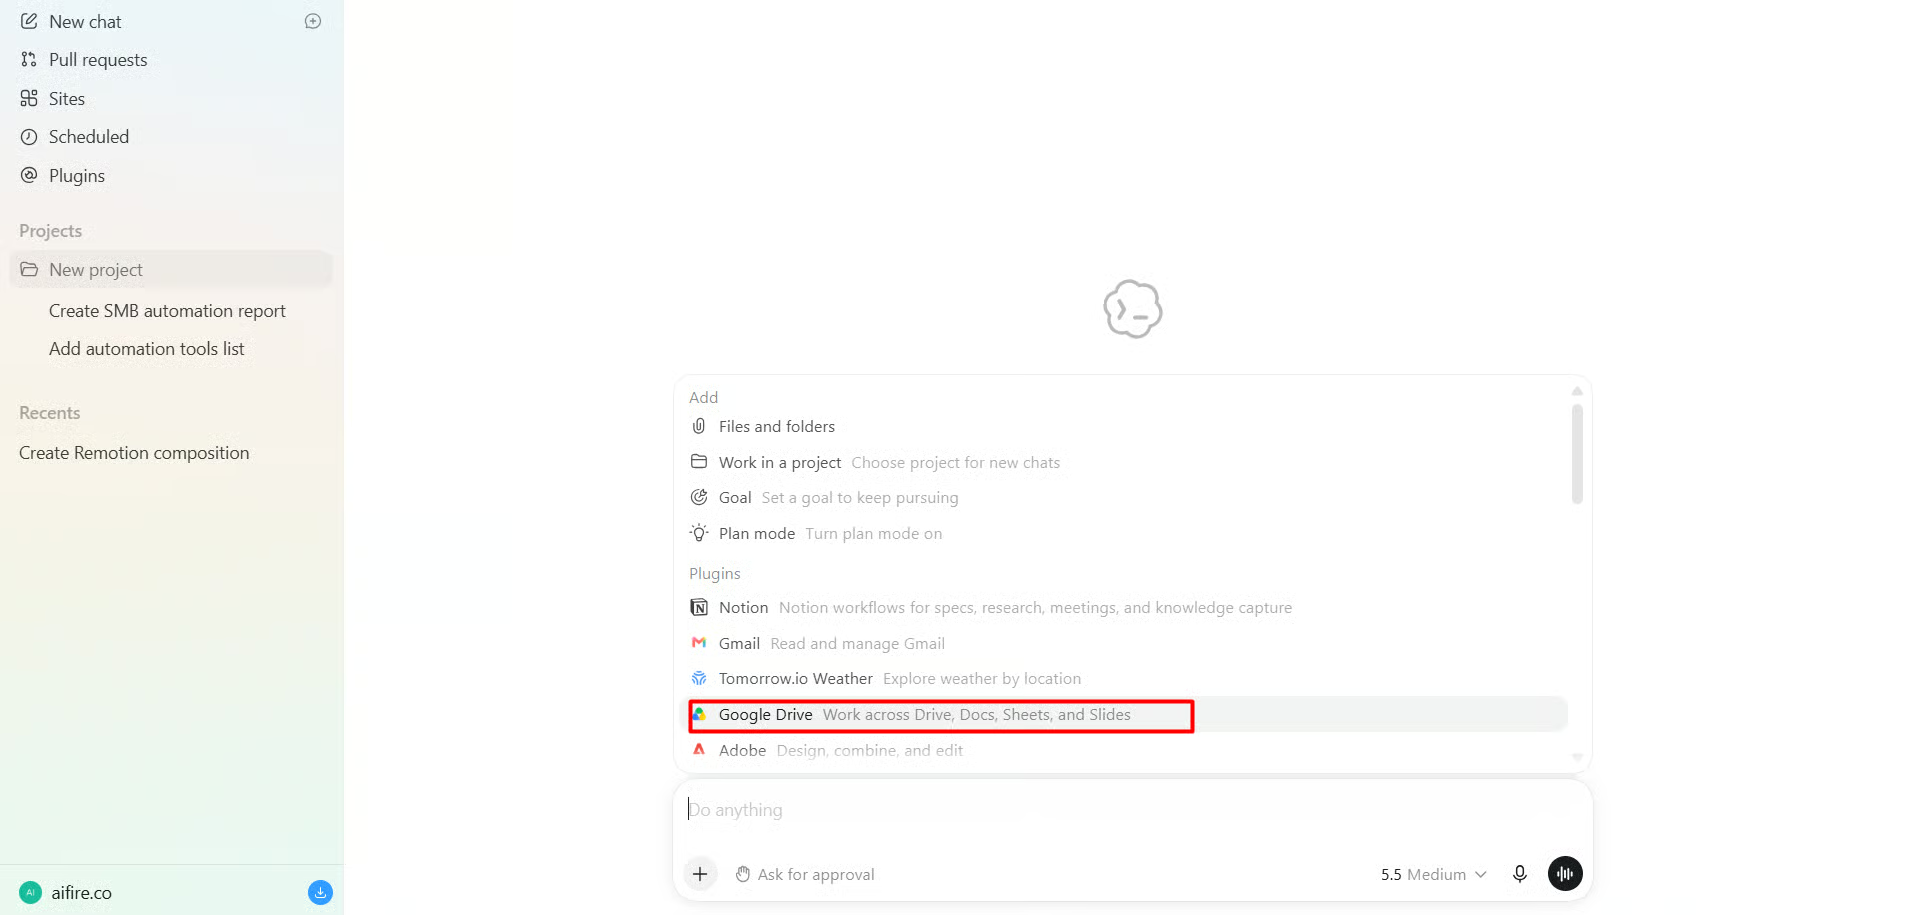
Step 4: Connect Google Drive
This one is genuinely exciting, and it got a lot better in August 2026.
ChatGPT can now keep a Google Doc, Sheet, or Slide open beside the conversation on the web, so a file can be read, summarized, and reworked without leaving the chat.
Google Drive Integration allows ChatGPT to work with your documents without forcing you to switch between different apps.
→ Go to Settings → Plugins (previously called "Apps" or "Connectors") → find Google Drive → click Connect→ authorize with Google.